
Discard half
Feed with equal parts flour and water
By day 4 or 5, you should see more bubbles, a tangy aroma, and noticeable growth.
Day 7: Ready to Use
Your starter should be doubling in size within 4–6 hours of feeding. It will smell pleasantly sour and look bubbly and alive. If so — congratulations! You’ve created an active sourdough starter.
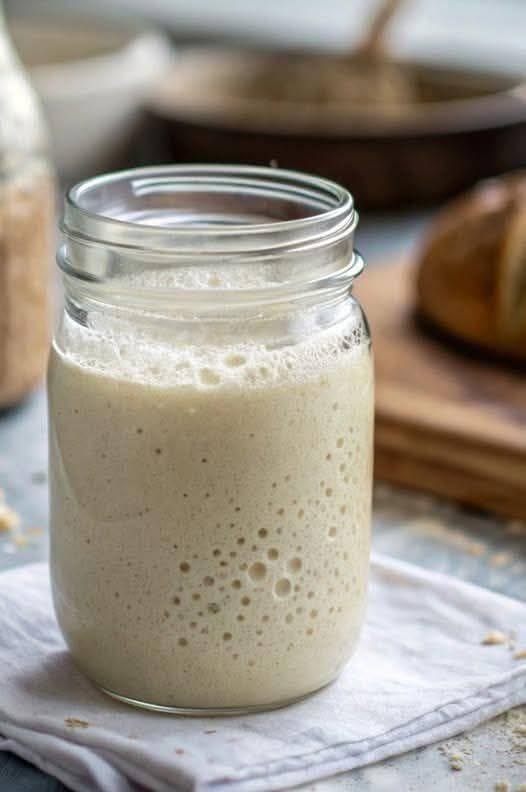
👨🍳 How to Know It’s Ready
✅ Doubles in size after a feeding
✅ Bubbly and airy texture
✅ Smells mildly tangy, like yogurt or ripe fruit
✅ Passes the “float test”: a spoonful dropped in water should float
🧊 Maintaining Your Starter
Baking daily? Keep it at room temperature and feed once every 24 hours.
Baking weekly? Store it in the fridge and feed once a week. Take it out a day before baking and give it a few feedings to reactivate.
Always discard half before feeding — this keeps the yeast population balanced and healthy.
🥐 What’s Next?
Now that your starter is alive and well, you’re ready to bake your first loaf of sourdough bread — or explore pancakes, pizza dough, crackers, and more, all with that signature tang.
Final Thoughts
Making your own sourdough starter may seem mysterious at first, but it’s truly just a partnership with nature. With a little patience and consistency, you’ll build a living culture that brings flavor, nutrition, and a bit of magic to your homemade bakes.
Once you’ve got your starter going, the possibilities are endless — and every loaf will carry the unique stamp of your kitchen.
Let me know if you’d like to follow up with a full sourdough bread recipe or troubleshooting tips for starters!
Demander à ChatGPT
ADVERTISEMENT
